
Ditching Store-Bought Breads

Bagels
Ingredients
1 ½ cup warm water
2 Tbs sugar
2 ¼ tsp active dry yeast
2 tsp salt
4 ½ cup bread flour
2 Tbs honey (for boiling water)
Directions
Combine water, sugar, and yeast in a mixing bowl. Once yeast is slightly foamy (5 - 10 minutes), add salt and 2 cups of the flour to the bowl.
With a bread hook, mix on medium while slowing adding the remaining flour. Mix until all flour is incorporated.
Finish kneading by hand until the dough forms into a smooth ball (approximately 10 minutes). Cover and let rise in a warm place for 60 - 90 minutes or until doubled in size.
Punch the dough down and divide into 8 pieces.
Roll each section into a rope, flatten into a rectangle and then roll the rectangle back into a tight rope. Wrap the rope around your hand connecting the two ends to form the bagel.
Gently roll the area where you connected the two ends, between your hand and the counter to help hold its shape.
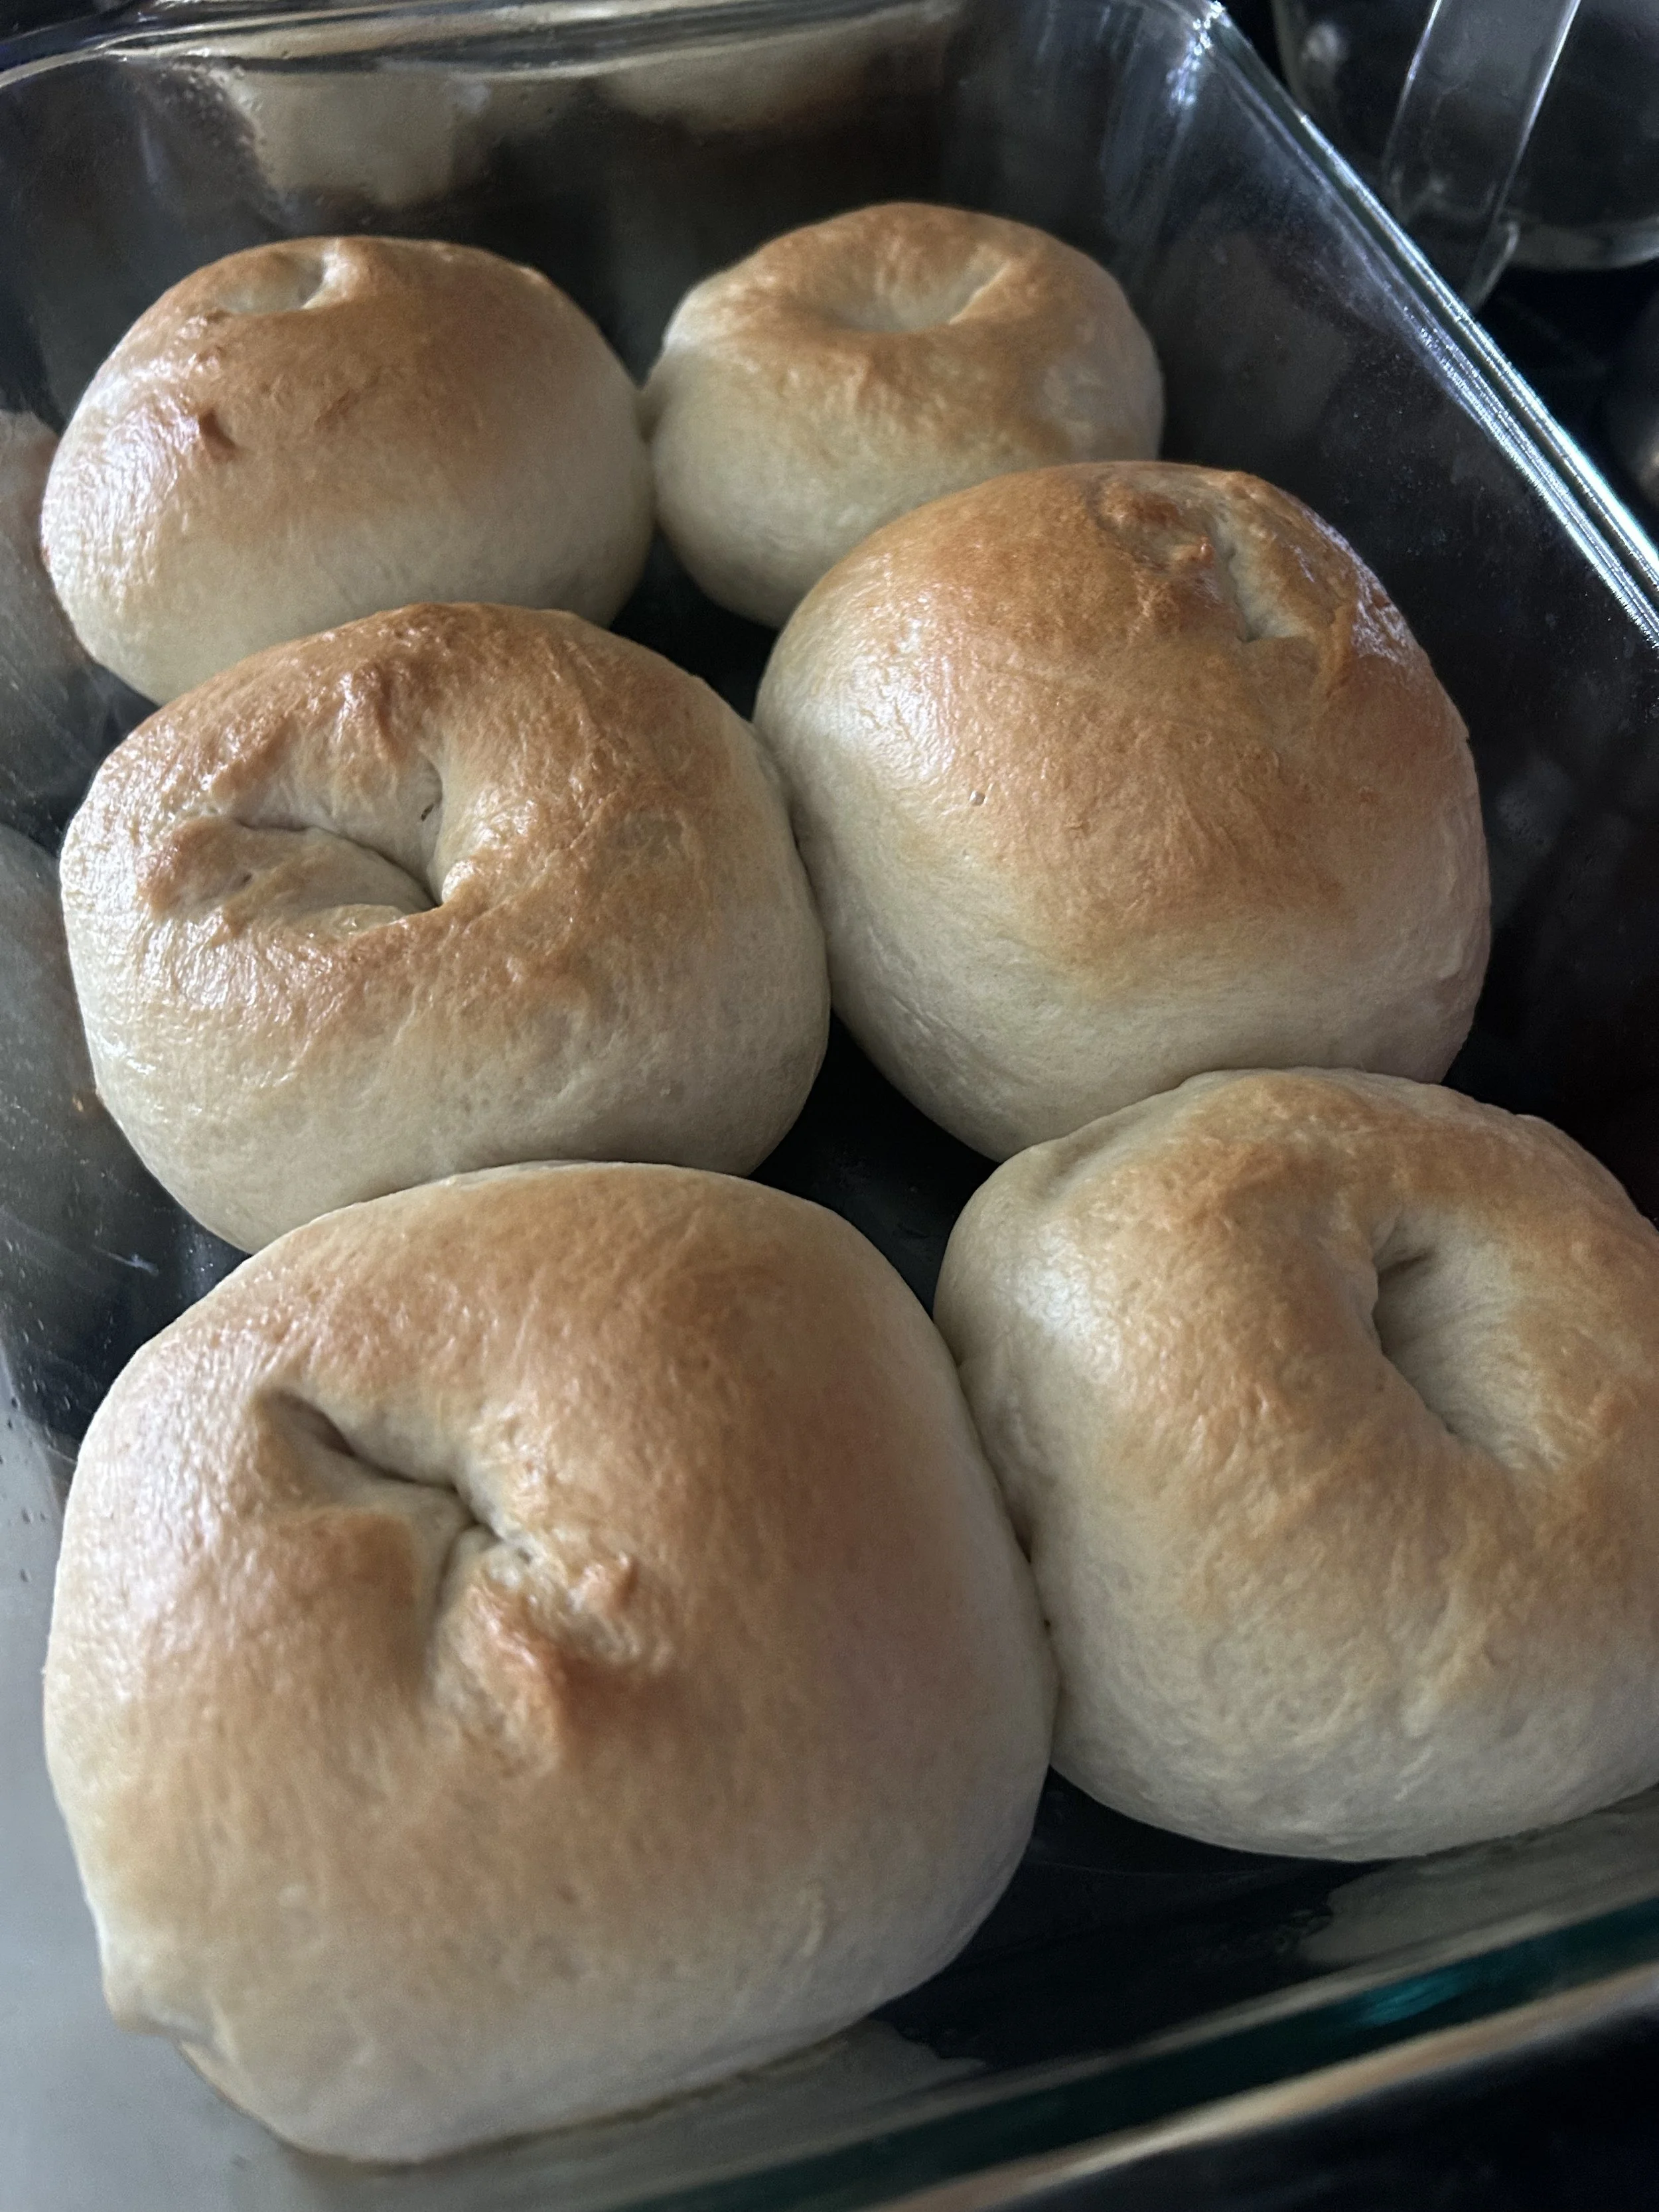
Place the bagels on a sheet pan lined with parchment paper and allow to rest for 45 - 60 minutes.
For NY-style bagels, cover with plastic wrap and put them in the fridge overnight. Boil and bake the next morning straight from the fridge.
Preheat the over to 425 degrees.
Bring a pot of water to boiling and add honey to the water.
Gently place 2 - 3 bagels in the pot at a time. Boil each side for 30 - 45 seconds. Remove from the water.
Optional: Add additional toppings.
Return to baking sheet.
Bake for 20 - 25 minutes or until golden brown on top.
Slice immediately once cooled and freeze them. Toast from freezer to enjoy.
Buttermilk Biscuits
Yields 6 - 8 large biscuits
Ingredients
3 cups all-purpose flower
1 Tbs baking powder
¼ tsp baking soda
1 tsp fine sea salt
1 tsp sugar
½ cup unsalted butter (frozen and grated)
¼ cup vegetable shortening (frozen and cubed)
1 to 1 ¼ cup buttermilk
3 Tbs salted butter (melted)
Directions
Put the unsalted butter and shortening in the freeze for 30 minutes before starting. Grate the frozen butter using a box grater; this ensures even distribution without overworking the dough.
In a large chilled bowl, whisk together the flour, baking powder, baking soda, salt, and sugar. Add the grated butter and frozen shortening cubes. Use a pastry cutter or your fingertips to snap the shortening into the flour until it looks like coarse crumbs with some pea-sizeed chunks remaining.
Make a well in the center and pour in 1 cup of cold buttermilk. Stir gently with a wooden spoon just until a shaggy dough forms. If it’s too dry to hold together, add the remaining ¼ cup of buttermilk one tablespoon at a time. Do not overmix.
Turn the dough onto a lightly floured surface. Pat it into a rectangle. Fold the dough in thirds (like a letter), rotate 90 degrees, and repeat this process 3 or 4 times. This creates those distinct layers.
Pat the dough to about 1-inch thickness. Use a 2.5 inch circular cutter. Press straight down - do not twist, or you will seal the edges and the biscuits won’t rise. Place the biscuits on a parchment-lined baking sheet so they are just touching each other (this helps them climb upward).
Pop the tray in the fridge for 10 minutes before baking to re-chill the fats.
Bake at 425 degrees Fahrenheit for 15 - 18 minutes, or until the tops are deeply golden brown.
The moment they come out of the oven, brush the tops generously with melted salted butter.
Cornbread
Yields one 9 or 10-inch skillet
Ingredients
1 ½ cups yellow cornmeal
½ cup all-purpose flour
2 Tbs sugar
1 Tbs baking powder
½ tsp baking soda
1 tsp fine sea salt
1 ½ cups buttermilk
2 large eggs
6 Tbs unsalted butter (melted and cooled)
2 Tbs butter or bacon drippings
Directions
Place the cast-iron skillet into the oven and preheat to 425 degrees Fahrenheit.
In a large bowl, whisk together the cornmeal, flour, sugar, baking powder, baking soda, and salt.
In a separate bowl, whisk the buttermilk, eggs, and the melted butter.
Pour the wet ingredients into the dry. Stir just until combined. Do not over-mix.
Carefully remove the hot skillet from the oven. Oil the pan with the butter or bacon drippings and swirl it around to coat the bottom and sides. It should be bubbling and slightly brown.
Immediately pour the batter into the hot skillet. You should hear it sizzle. Smooth the top and slide it back in the oven. Bake for 20 - 25 minutes, or until the top is golden brown and a toothpick comes out clean.
Corn Tortillas
Yields 12 - 15 tortillas
Ingredients
2 cups masa harina
1 ½ to 1 2/3 cups hot water (120 degrees)
½ tsp fine sea salt
Directions
In a large bowl, whisk the masa harina and salt. Slowly pour in 1 ½ cups of the hot water. Use your hand or a sturdy spoon to mix until a dough forms.
Knead the dough in the bowl for about 2 minutes. It should feel like smooth Play-Doh and shouldn’t stick to your hands.
If it’s crumbly, add more hot water 1 tablespoon at a time. If it’s sticky, add a dusting of masa.
Cover the dough with a damp kitchen towel and let it rest for 30 minutes. This allows the corn flour to fully hydrate, which prevents the tortillas from being brittle and cracking when you fold them.
Divide the dough into golf-ball-sized rounds.
Line a tortilla press (or us the bottom of a heavy glass baking dish) with a plastic freezer bag that has been cup open on the sides.
Place a ball in the center and then press down firmly until the tortilla is about 6 inches wide and very thin.
Heat a dry cast-iron skillet or griddle over medium-high heat. You don’t need oil.
Lay the tortilla down. Cook for 30 - 45 seconds until it releases easily and has a few light brown spots.
Flip and cook for 60 seconds. You should see more brown “char” marks.
Flip it back to the first side and press down gently with a spatula. If your hydration is right, it will puff up with steam - this is the sign of a perfect tortilla.
As they come off the heat, immediately place them inside a clean kitchen towel or tortilla warmer. The trapped steam finishes the cooking process and keeps them soft and flexible.
Croissants
Yields 12 - 15 large croissants
Ingredients
500g bread flour
1 ¼ cups milk (cold)
1/3 cup sugar
3 Tbs unsalted butter (softened)
2 ¼ tsp active dry yeast
2 tsp fine sea salt
1 ½ cups high-quality butter (82% fat)
1 large egg + 1 Tbs water (for washing)
Day 1 Directions
Combine the milk, yeast, sugar, flour, and salt in a stand mixer. Mix with the dough hook until a smooth, firm dough forms (about 5 minutes).
Shape into a flat square, wrap in plastic, and let it sit at room temperature for 30 minutes.
Move it to the fridge and let it rest overnight (or at least 6 hours). This chills the gluten so it doesn’t fight you tomorrow.
Day 2 Directions
Place your cold butter sticks between two sheets of parchment paper. Use a rolling pin to pound and roll the butter into a 7×7 inch square. It should be pliable (like cold clay) but not melting. Put it back in the fridge for 10 minutes.
Roll your cold dough into an 11×11 inch square. Place the butter block diagonally in the center of the dough. Fold the corners of the dough over the butter to “envelope” it. Seal the seams.
Roll the dough into a long rectangle (about 20 inches long). Fold it like a letter (in thirds). Wrap and chill for 1 hour.
Repeat the rolling and folding. Wrap and chill for 1 hour.
Final roll and fold. Wrap and chill overnight. This creates the 27 layers of butter.
Day 3 Directions
Roll the dough into a long, thin rectangle (10 × 30 inches).
Use a pizza cutter to cut long, skinny triangles (about 4 inches wide at the base).
Cut a small slit in the center of the base, then roll toward the tip. Place on a parchment-lined sheet.
This is critical. Let them rise at room temperature for 2 - 2.5 hours. They should look like puffy marshmallows and jiggle when you shake the pan.
Brush with egg wash. Bake at 400 degrees Fahrenheit for 10 minutes, then lower to 375 degrees for another 10 - 15 minutes until deep mahogony brown.
Hawaiian Rolls
Yields 12 - 15 rolls
Ingredients
½ cup pineapple juice (lukewarm, 110 degrees)
¼ cup whole milk (lukewarm)
6 Tbs unsalted butter (melted)
2 Tbs honey
1/3 cup brown sugar (packed)
1 large egg
2 ¼ tsp active dry yeast
1 tsp vanilla extract
1 tsp fine sea salt
3 ½ to 4 cups bread flour
1 tsp honey + melted butter (for brushing)
Directions
In your stand mixer bowl, whisk together the pineapple juice, milk, and 1 tablespoon of the brown sugar. Sprinkle the yeast over the top and let it sit for 5 - 10 minutes until it’s bubbly and active.
Add the remaining brown sugar, honey, melted butter, egg, vanilla, and salt to the yeast mixture. Whisk until the egg is fully integrated.
Add 2 cups of flour and mix with the dough hook on low. Gradually add the remaining flour ½ cup at a time. This dough should be very soft and slightly sticky. If you add too much flour, the rolls will be dense rather than airy. Knead on medium-low for 5 - 7 minutes until the dough is smooth and elastic.
Place the dough in a lightly oiled bowl. Cover and let rise in a warm, draft-free spot until doubled in size (about 1 to 1.5 hours).
Because of the high sugar and acidity, this dough may take slightly longer to rise than standard white bread.
Punch the dough down and divide into 12 - 15 equal pieces (about 60 - 70g each if using a scale). Roll them into tight, smooth balls. Place them in a greased 9 × 13 inch baking pan, spaced evenly. They should barely be touching.
Cover and let rise again for 45 - 60 minutes. They should puff up significantly and be pressed firmly against one another.
Bake at 350 degrees Fahrenheit for 18 - 22 minutes. If the tops start browning too quickly due to the sugar content, you can loosely tent them with foil for the last 5 minutes.
As soon as they come out, brush the tops with the honey-butter mixture. This givens them that iconic sticky, shiny top and keeps the crust soft.
Since these are preservative-free, they are best eaten within 2–3 days. However, because they are so enriched, they freeze beautifully! Just wrap them tightly in foil and a freezer bag, then reheat in a 300-degree oven for a few minutes to restore that "just-baked" softness.
English Muffins
Ingredients
1 ¼ cup warm milk (105°F to 115°F)
2 Tbs melted butter
2 Tbs brown sugar
1 tsp active dry yeast
1 tsp fine sea salt
2 ½ cups all-purpose flour
¼ cup cornmeal for dusting
Directions
Combine milk, butter, sugar, and yeast in a bowl. Let stand 5 minutes or until yeast blooms. If it doesn't look foamy (like the head of a beer), your yeast is dead—start over!
Add salt and flour and mix until a shaggy, very sticky dough forms. Use a bowl scraper or well-floured hands to fold it a few times. The high hydration is what creates the air pockets.
Cover and set in a warm place for 1 - 2 hours or until it doubles in size.
Turn the dough out on a floured surface.
Flour your rolling pin and roll out to ½ inch to 1 inch thick.
Cut out 3” circles. Dip the cutter in flour between each use so it doesn't tear the dough. Repeat until all dough is used.
Line a pan with parchment paper. Sprinkle a baking sheet generously with 2 tbsp of cornmeal. Place the cut muffins on top, then sprinkle the tops with another 2 tbsp of cornmeal. Cover and let rise for an hour.
Heat a large pan on the stove and cook each English muffin over medium low heat for 3 - 5 minutes on each side or until golden brown.
If the outside browns too fast but the middle is gummy, finish them in a 350°F oven for 5 minutes.
Store in an airtight container for up to 1 week.
For long-term storage, slice them, put them in a freezer bag, and freeze them. They toast up perfectly directly from the freezer!
Glazed Donuts
Dough
1 cup whole milk (warmed to 110°F)
2 ¼ tsp active dry yeast
1/3 cup granulated sugar
5 Tbs unsalted butter, softened
1 large egg, room temperature
½ tsp salt
3 ½ cups all-purpose flour (plus extra for dusting)
1–2 quarts vegetable oil (for frying)
Glaze
2 cups powdered sugar
1/3 cup unsalted butter, melted
1 ½ tsp vanilla extract
4–6 Tbs hot water (add slowly for desired consistency)
Directions
In a large bowl, whisk the warm milk, sugar, and yeast. Let sit for 5 minutes until foamy.
Add the softened butter, egg, and salt. Gradually mix in the flour. This dough will be very sticky—resist the urge to add too much extra flour!
Using a stand mixer with a dough hook, knead for 5 minutes (or 8 minutes by hand) until smooth but still tacky.
Cover and let rise in a warm spot for 1 ½ to 2 hours until doubled.
Punch the dough down and roll it out on a well-floured surface to ½-inch thickness.
Use a donut cutter (or a large glass and a small bottle cap) to cut shapes.
Place the donuts on a parchment-lined sheet, cover loosely, and let rise again for 30–45 minutes. They should look airy and "puffy."
In a heavy pot, heat oil to 350°F. Use a thermometer; if the oil is too cool, the donuts get greasy.
Carefully drop 2–3 donuts into the oil. Fry for about 60 seconds per side until very lightly golden.
Remove with a slotted spoon and place on a wire cooling rack with paper towels underneath.
Combine all glaze ingredients until perfectly smooth. It should be thin enough to run, but thick enough to coat a spoon.
While the donuts are still very warm, dip each one completely into the glaze. Flip to coat both sides.
Place back on the wire rack. The glaze will thin out and "set" as the donut cools.
Hamburger Buns
Yields 8 large buns
Ingredients
1 cup warm water (about 110°F)
2 ¼ tsp active dry yeast
2 Tbs granulated sugar
4 Tbs unsalted butter, melted and cooled
1 large egg, room temperature
3 ½ cups all-purpose flour (plus extra for kneading)
1 ½ tsp kosher salt
1 egg beaten with 1 tbsp milk (plus sesame seeds or dried onion flakes)
Directions
In a large bowl (or stand mixer), whisk together the warm water, sugar, and yeast. Let it sit for about 5–10 minutes until a thick foam forms on top.
Whisk the melted butter and egg into the yeast mixture. Add the flour and salt.
If using a mixer: Use the dough hook on medium-low for 5–7 minutes. The dough should be soft, shiny, and slightly tacky, but it should pull away from the sides of the bowl.
If by hand: Knead on a floured surface for 8–10 minutes. If the dough is too sticky to handle, add flour one tablespoon at a time.
Place the dough in a greased bowl, cover with a damp towel, and let rise in a warm spot for 1 to 1 ½ hours, or until it has doubled in size.
Gently punch the dough down. Divide it into 8 equal pieces (about 90–100g each if you have a kitchen scale).
Cup your hand over a piece of dough on a clean, un-floured surface. Move your hand in a circular motion, keeping the "heel" of your hand on the counter, until the dough forms a tight, smooth ball.
Place the balls on a parchment-lined baking sheet and gently press down with your palm to flatten them slightly. They should look like thick discs, not perfect spheres
Cover loosely with plastic wrap or a light towel. Let rise for another 45–60 minutes. They should look very puffy and almost touch each other. Preheat your oven to 375°F during this time.
Gently brush the tops with the egg/milk wash. This is what gives them that professional mahogany shine. Sprinkle with sesame seeds if desired. Bake for 15–18 minutes until the tops are deep golden brown.
Hotdog Buns
Yields 8–10 buns
The Ingredients
1 cup whole milk (warmed to 110°F)
2 ¼ tsp active dry yeast
2 tbsp granulated sugar
4 Tbs unsalted butter, softened
1 large egg, room temperature
1 tsp kosher salt
3 ¼ to 3 ½ cups all-purpose flour
2 Tbs melted butter (for brushing after baking)
Directions
Whisk the warm milk, sugar, and yeast in your mixing bowl. Let sit for 5–10 minutes until foamy.
Add the softened butter, egg, salt, and 3 cups of flour.
Using a stand mixer (5–7 minutes) or by hand (8–10 minutes), knead until the dough is smooth and elastic. Add the remaining ½ cup of flour only if the dough is too sticky to handle. It should be very soft.
Place in a greased bowl, cover, and let rise in a warm spot for about 1 hour, or until doubled.
Punch the dough down and divide it into 8 to 10 equal pieces.
Roll each piece into a small rectangle (about 4x6 inches). Fold the long sides into the middle, then fold in half again, pinching the seam tightly.
Roll it gently under your palms until it’s a cylinder about 5–6 inches long.
Place the buns on a parchment-lined baking sheet, side-by-side, leaving only about ½ inch of space between them. As they rise, they will touch, which keeps the sides soft and forces them to grow tall.
Cover and let rise for 45–60 minutes until very puffy. Preheat your oven to 375°F.
Bake for 15–18 minutes until the tops are just starting to turn golden.
As soon as they come out of the oven, brush the tops generously with melted butter. This keeps the crust incredibly soft and gives it that classic "store-bought" feel without the preservatives.
Muffins
Yields 12 standard muffins
Ingredients
3 cups all-prupose flour
1 Tbs baking powder
½ tsp baking soda
½ tsp fine sea salt
½ cup unsalted butter (melted and cooled)
1 cup granulated sugar
2 large eggs (room temperature)
½ cup greek yogurt or sour cream
½ cup milk
2 tsp vanilla extract
1 ½ to 2 cups fresh blueberries or chocolate chips
Directions
Preheat your oven to 425 degrees Fahrenheit. Starting at a high heat creates an immediate “burst” of steam that lifts the muffin tops quickly before the edges set.
In a large bowl, whisk the flour, baking powder, baking soda, and salt.
Toss your blueberries or chocolate chips in 1 tablespoon of the flour mixure before adding them to the batter. This light coating prevents them from sinking to the bottom of the muffin.
In a medium bowl, whisk the melted butter and sugar until combined. Add the eggs one at a time, followed by the yogurt/sour cream, milk, and vanilla.
Fold the wet ingredients into the dry with a spatula. Stop when you still see a few streaks of flour. Gently fold in your blueberries or chocolate chips. The batter should be very thick - more like a soft dough than a liquid.
In a greased or lined muffin tin, fill each cup all the way to the top. Unlike cupcakes, muffins need that extra volume to create the “mushroom top” look.
Place muffins in the oven at 425 for exactly 5 minutes.
Without opening the oven door, reduce the heat to 350 degrees Fahrenheit.
Bake for another 13 - 17 minutes until a toothpick comes out clean.
Because these are made with real butter and no preservatives, they stay moist for about 2 days at room temperature. For longer storage, they freeze beautifully—just pop one in the microwave for 20 seconds for a "fresh from the oven" feel.
Pancakes
Yields 8 - 10 medium pancakes
Ingredients
2 cups all-purpose flour
2 Tbs sugar
2 tsp baking powder
1 tsp baking soda
½ tsp fine sea salt
2 cups buttermilk (room temperature)
2 large eggs (room temperature)
4 Tbs melted butter (slightly cooled)
1 tsp vanilla extract
Directions
In a large bowl, whisk together the flour, sugar, baking powder, baking soda, and salt.
In a separate medium bowl, whisk the buttermilk, eggs, and vanilla. Slowly pour in the melted butter while whisking constantly.
Pour the wet ingredients into the dry. Use a spatula to fold them together until just combined. Stop as soon as the flour streaks disappear.
Let the batter sit on the counter for 10 minutes. You’ll see small bubbles forming on the surface. This allos the flour to fully hydrate and the leavening agents to activate, ensuring a massive rise on the griddle.
Heat a non-stick skillet or griddle over medium-low heat. Lightly grease with a tiny bit of butter or neutral oil.
Scoop about 1/3 cup of batter per pancake.
Wait until you see bubbles form on the surface and the edges look set and matte. Flip once.
Cook the second side for about 1 - 2 minutes until golden.
Pizza Dough
Yields two 12-inch pizzas
Ingredients
1 ½ cups warm water (105 degrees Fahrenheit)
1 tsp honey
2 ¼ tsp active dry yeast
3 ½ to 4 cups bread flour
2 Tbs extra virgin olive oil
2 tsp fine sea salt
½ tsp garlic powder
Directions
In your stand mixer bowl (or a large bowl), combine the warm water, honey, and yeast. Let it site for 10 minutes until it looks like a frothy cappuccino.
Add the olive oil, salt, and 2 cups of flour. Use the dough hook to combine. Gradually add the remaining flour ½ cup at a time until the dough pulls away from the sides of the bowl.
Knead for 5 - 7 minutes on medium-low speed. Use the window-pane test: pull off a small piece of dough and stretch it gently; if you can see light through it without it tearing, the gluten is ready.
Place the dough in a lightly oiled bowl, turning once to coat.
Cover and place in the fridge for 24 - 72 hours. (If you need it sooner, let it rise in a warm spot for 1.5 hours.)
Punch the dough down and divide into two balls. On a lightly floured surface, flatten the ball into a disk. Use your knuckes to gently stretch the edges outward, leaving a slightly thicker “rim” for the crust. Avoid using a rolling pin, as it crushes the air bubbles your worked so hard to create.
Preheat you oven as high as it will go - typically 500 degrees Fahrenheit. If you have a pizza stone, let it heat up for 30 minutes first.
Top your pizza and bake for 8 - 12 minutes until the crust is charred in spots and the cheese is bubbling.
Pretzel Bites
Ingredients
½ cup warm water (100 - 115 degrees)
2 tsp honey
2 tsp kosher salt (plus extra for topping)
2 ¼ tsp active dry yeast
4 ½ cups all-purpose flour
4 Tbs unsalted butter (melted)
2/3 cup baking soda
Egg wash: 1 egg yolk + 1 Tbs water
Directions
In a large bowl, mix water, honey and yeast. Let sit for 5 - 10 minutes until foamy.
If it doesn’t foam, your yeast may be expired or the water was too hot.
Add flour and melted butter. Knead 5 - 10 minutes until smooth and elastic.
If using a mixer: Use the dough hook on medium speed until the dough is smooth and clears the sides of the bowl (about 5 minutes).
If by hand: Knead on a lightly floured surface for 8–10 minutes until the dough is elastic and no longer sticky.
Cover and let rise for 1 hour or until doubled in size.
Preheat oven to 450 degrees.
Line two baking sheets with parchment paper.
In a large pot, bring the 10 cups of water and the baking soda to a rolling boil.
Turn the dough onto a flat surface. Divide into 8 equal pieces. Roll each piece into a long rope, roughly 1 inch thick. Using a bench scraper or knife, cut the rope into 1-inch segments.
Drop the bites into the boiling soda water in batches of about 10–15. Boil for 20–30 seconds—no longer, or they may develop a metallic aftertaste. Remove with a slotted spoon, draining well, and arrange on the prepared baking sheets.
Brush the tops of the bites generously with the egg wash and sprinkle immediately with kosher salt. Bake for 10–12 minutes, or until they reach a deep, golden brown.

Sandwich Bread
Ingredients
2 ¼ cups milk
2 ¼ tsp dry active yeast
¼ cup granulated sugar
2 tsp fine sea salt
3 Tbs unsalted butter (softened)
6 cups bread flour
Directions
Scald the milk (heat to just below boiling) and then allow to cool to 105 - 110 degrees.
Combine milk, yeast, and sugar. Let sit for 10 until foamy.
Add salt, butter and half of the bread flour to the bowl and mix. Slowly add in the remaining flour or until the dough clears the sides of the bowl but still feels tacky.
Once combined, knead for 7 - 10 minutes.
Transfer dough to a greased bowl and allow to double in size (approximately 1 - 2 hours).
Punch the dough down and turn it out onto a floured counter.
Divide into two equal portions. Shape by patting the dough into a rectangle. Fold the short ends in slightly, then roll it up tightly like a sleeping bag.
Place the dough (seam down) into two well-greased loaf pans.
Allow to rise until the dough is 1 inch above the top of your pan.
Bake at 375 degrees for 30 - 35 minutes. The bread is done when the internal temperature reaches 190 degrees.
If you notice the top getting dark before the 20-minute mark, loosely “tent” a piece of aluminum foil over the loaves. This reflects direct heat and allows the interior to finish cooking while keeping the top crust thin and supple.
Brush the top and sides with melted butter. Allow to cool for at least 1 hour before slicing.
Store in an airtight container for up to 1 week.
Rolls
Yields 12 large yeast rolls
Ingredients
½ cup warm water (105 degrees Fahrenheit)
2 ¼ tsp active dry yeast
1 tsp honey
1 cup warm whole milk (105 - 115 degrees)
½ cup unsalted butter (melted)
1/3 cup sugar
1 large egg (room temperature)
1 ½ tsp fine sea salt
4 to 4 ½ cups all-purpose flour
¼ cup salted butter (melted)
Directions
In your stand mixer bowl, combine the warm water, yeast, and honey. Let it sit for 5 - 10 minutes until it becomes foamy.
Whisk the milk, butter, sugar, and egg into the yeast mixture.
Add 2 cups of flour and the salt. Using the dough hook, mix on low. Gradually add the remaining flour ½ cup at a time until the dough clears the sides of the bowl but still feels slightly tacky to the touch.
Do not over-flour. A slightly sticky dough leads to a lighter, fluffier roll.
Knead the dough for about 5 - 7 minutes in the mixer (or 10 by hand) until smooth and elastic. Place in a lightly greased bowl, cover with a damp cloth, and let rise in a warm spot until doubled in size (about 1 hour).
Punch the dough down. Divide into 12 equal pieces (use a scale for precision). Shape each into a smooth ball by pulling the sides down tucking them under the bottom.
Place the balls in a greased 9×13 inch baking pan. They should be spaced out but will grow to touch each other during the second rise - this “crowding” is what forces them to rise upward and stay soft on the sides.
Cover and let rise again for 45 - 60 minutes. They should look very puffy and be pressed against one another.
Bake at 350 degrees Fahrenheit for 88 - 22 minutes. The tops should be a deep golden brown.
The moment they exit the oven, brush that extra ¼ cup of melted salted butter over the tops. Let it seep down into the crevices between the rolls.
Scones
Yields 8 large wedges
Ingredients
2 cups all-purpose flour
1/3 cup granulated sugar
1 Tbs baking powder
½ tsp fine sea salt
½ cup unsalted butter (frozen and grated)
1 cup heavy cream (very cold)
1 large egg
1 ½ tsp vanilla extract
extra heavy cream and coarse sugar (for brushing)
Directions
In a large bowl, whisk together the flour, sugar, baking powder, and salt.
Grate the frozen butter into the flour. Use your fingertips to quickly toss the butter strands into the flour until they are coated. You want to see “shavings” of butter, not a paste.
Whisk the egg and vanilla into the cold heavy cream. Pour this into the center of the flour mixture. Use a fork to gently toss the liquid with dry ingredients until a shaggy, clumpy dough forms.
Stop mixing before it becomes a solid ball. If there are a few dry crumbs at the bottom, that’s fine.
Turn the dough onto a lightly floured surface. Gently pat it into a rectangle. Fold it in half, then half again. This creates the layers that make a scone flaky rather than cakey.
Pat the dough into a 7-inch circle, about 1-inch thick. Use a sharp knife to cut the circle into 8 wedges.
Place the wedges on a baking sheet and pop them in the freezer for 15 minutes before baking. This relaxes the gluten and ensures the butter is rock-solid.
Preheat your oven to 400 degrees Fahrenheit. Brush the tops with a little extra cream and sprinkle with coarse sugar. Bake for 18 - 22 minutes until the edges are golden and the tops are set.
Tortillas
Yields: 10–12 tortillas
Ingredients
3 cups all-purpose flour
1 tsp salt
1 tsp baking powder
1/3 cup room-temperature butter
1 cup warm water (about 110°F)
Instructions
In a large bowl, whisk together the flour, salt, and baking powder.
Add butter. Use a pastry cutter or your fingers to work the fat into the flour until the mixture resembles coarse crumbs.
Pour in the warm water. Stir with a wooden spoon until a shaggy dough forms.
Turn the dough onto a lightly floured surface. Knead for about 2–3 minutes until the dough is smooth and slightly elastic.
Divide the dough into 10–12 equal-sized balls (about the size of a golf ball). Place them on a plate, cover with a damp kitchen towel, and let them rest for at least 30 minutes.
Note: This allows the gluten to relax. If you skip this, the dough will keep "snapping back" when you try to roll it out.
On a lightly floured surface, use a rolling pin to flatten each ball into a thin 7- or 8-inch circle. They should be thin enough that you can almost see your hand through them.
Heat a cast-iron skillet or griddle over medium-high heat (no oil needed). Place a tortilla in the hot pan. Cook for about 45–60 seconds until bubbles form and the bottom has light brown spots. Flip and cook the other side for another 30 seconds.
Place the cooked tortillas in a clean kitchen towel or a tortilla warmer as you go. The steam helps keep them soft and pliable.
Storage and Freshness
Store in a zip-top bag for up to 2 days.
They will last about 1 week in the fridge.
These freeze beautifully. Place a piece of parchment paper between each tortilla so they don't stick, and freeze for up to 3 months.
To restore that "just-made" softness, heat them for 15 seconds in a dry pan or wrapped in a damp paper towel in the microwave.
Waffles
Yields 4 - 6 large Belgian waffles
Ingredients
2 cups all-purpose flour
2 Tbs sugar
1 Tbs baking powder
½ tsp fine sea salt
1 ¾ cups milk (room temperature)
2 large eggs (separated)
½ cup unsalted butter (mealted and cooled)
1 tsp vanilla extract
Directions
In a large bowl, whisk together the flour, sugar, baking powder, and salt. Make a well in the center.
Separate your egg yolks from the whites. Place the whites in a clean, dry glass or metal bowl. Using a whisk or hand mixer, beat the whites until stiff peaks form (when you life the whisk, the point should stand straight up). Set these aside.
In a medium bowl, whisk the milk, melted butter, vanilla, and egg yolks. Pour this liquid mixture into the well of the dry ingredients. Whisk gently until mostly smooth - a few tiny lumps are perfectly fine.
Gently fold about 1/3 of the beaten egg whites into the batter to lighten it up. Then, add the remaining whites and fold them in with a spatulat using a “cut and roll” motion.
You want to see small white streaks of egg white. Do not over-mix, or you’ll deflate the air you just beat into the whites.
Preheat your waffle iron. Lightly brush with melted butter or oil. Pour the batter on the hot iron (usually about ½ to ¾ cup depending on the machine).
Cook until the steam stops coming out of the sides of the waffle iron. This is usually the best indicator that the interior is set and the exterior is crisp.