
Baking Aisle DIYs
Baking Powder
Yields ½ cup
Ingredients
¼ cup cream of tartar
2 Tbs baking soda
2 Tbs cornstarch
Directions
Place all three ingredients into a fine-mesh sieve over a bowl. Sift them together at least twice to ensure the baking soda and cream of tartar are perfectly distributed.
Transfer the mixture to a small, airtight glass jar.
Brown Sugar
Yields 1 cup
Ingredients
1 cup granulated sugar
1 Tbs unsulfured molasses (2 Tbs for dark brown sugar)
Directions
Place your granulated sugar in a medium mixing bowl.
Drizzle the molasses over the top of the sugar. Usin a fork or a stand mixer with the paddle attachment, mix until the color is completely uniform and no streaks of dark molasses remain.
Store in an airtight glass jar.
If brown sugar hardens in storage, place a small piece of dehydrated apple in the jar for 24 hours.
Caramel Sauce
Yields: Approx. 1 ½ cups
Ingredients
1 cup granulated sugar
6 tbsp unsalted butter (room temperature and cubed)
½ cup heavy cream (room temperature)
1 tsp fine sea salt
1 tsp vanilla extract
Directions
In a heavy-bottomed saucepan over medium heat, spread the sugar in an even layer. Heat it without stirring. As it starts to melt at the edges, you can gently whisk or swirl the pan. Cook until it turns a deep amber color (about the color of an old penny). Watch closely—it goes from perfect to burnt in seconds.
Once the sugar is fully melted and amber, whisk in the butter. The mixture will bubble up violently; this is normal. Whisk until the butter is completely melted and combined.
Slowly pour in the heavy cream while whisking constantly. Again, it will bubble and steam. Allow the mixture to boil for 1 minute—this helps it thicken.
Remove from heat. Stir in the sea salt and vanilla extract.
Let it cool in the pan for about 10 minutes, then pour it into a glass jar.
Storage & Usage
Refrigerator: It will stay fresh for up to 3 weeks. It will firm up significantly when cold.
Freezer: You can freeze it in a wide-mouth jar for up to 3 months.
To Reheat: Simply microwave for 15–20 seconds or place the jar in a bowl of warm water to bring it back to a pourable consistency.
Chocolate Chips
Yields 1 cup
Ingredients
½ cup cocoa butter
½ cup cocoa powder
3 Tbs maple syrup or honey
1 tsp vanilla extract
¼ tsp fine sea salt
Directions
Set up a double boiler by placing a heat-proof glass bowl over a pot of simmering water. Ensure the bottom of the bowl does not touch the water.
Gently melt the cocoa butter in the bowl. Once fully liquid, whisk in the cocoa powder, sweetener, vanilla, and salt. Whisk until the mixture is completely smooth and glossy.
Let the mixture cool slightly until it thickens to the consistency of a heavy syrup. Transfer it to a small piping bag.
Line a baking sheet with parchment paper. Pipe tiny dots oto the paper.
Place the tray in the refrigerator for at least 30 minutes. Once hard, peel them off the parchment paper.
Chocolate Syrup
Yields: Approximately 2 cups
Ingredients
1 1/2 cups water
1 cup granulated sugar
½ cup brown sugar
1 cup unsweetened cocoa powder
1/4 tsp salt
1 tsp vanilla extract
Instructions
In a medium saucepan, whisk together the sugars, cocoa powder, and salt. Breaking up any large cocoa clumps now makes for a smoother syrup later.
Gradually whisk in the water until the mixture is relatively smooth.
Place the pan over medium heat. Bring to a gentle boil, whisking frequently to ensure the cocoa doesn't scorch on the bottom.
Once it reaches a boil, reduce the heat to low and simmer for about 3–5 minutes. The syrup will look thin while hot, but it will thicken significantly as it cools.
Remove the pan from the heat. Let it cool for about 5 minutes, then stir in the vanilla extract.
Pour the syrup into a glass jar or a squeeze bottle.
Storage and Usage
Keep this syrup in the refrigerator. It will stay fresh and delicious for 2 to 3 months.
Since this version doesn't contain the corn syrup or potassium sorbate found in commercial bottles, it may develop a thin "skin" or slight crystallization over time. Simply give it a quick shake or stir before using.
Hazelnut Spread
Yields: Approx. 1 ½ cups
Ingredients
2 cups raw hazelnuts (approx. 10 oz)
⅔ cup dark chocolate chips (melted)
2 tbsp avocado oil
3 tbsp powdered sugar
1 tbsp unsweetened cocoa powder
½ tsp vanilla extract
½ tsp sea salt
Directions
Preheat your oven to 350°F. Spread hazelnuts on a baking sheet and roast for 12–15 minutes until the skins are dark and the nuts are fragrant.
While the nuts are still warm, place them in a clean kitchen towel and rub them vigorously together. Most of the bitter skins will flake off. Don't worry if a few stubborn bits remain.
Place the warm hazelnuts in a food processor or high-powered blender. Process for about 5–8 minutes. At first, it will look like flour, then a thick paste, and finally a smooth, runny nut butter. Be patient; this is the most important step.
Add the oil, powdered sugar, cocoa powder, vanilla, and salt. Process for another minute until fully incorporated.
While the processor is running, slowly pour in the melted chocolate. Blend until the mixture is glossy and perfectly smooth.
Pour into a glass jar. It will be slightly runny while warm but will thicken as it cools.
Storage & Shelf Life
Pantry: Because this contains no dairy or water, it is shelf-stable for 2–3 weeks in a cool, dark place.
Refrigerator: It will stay fresh for up to 2 months, but it will become quite firm. If you refrigerate it, let it sit on the counter for 15 minutes before using so it’s spreadable.
Marshmallows
Yields approximate 24 - 30 large marshmallows
Ingredients
½ cup cold water
21g (3 packets) unflavored gelatin
1 ½ cups granulated sugar
1 cup honey
¼ tsp fine sea salt
½ cup water
1 Tbs vanilla extract
½ cup powdered sugar
½ cup cornstarch
Directions
Place ½ cup of cold water in the bowl of your stand mixer. Sprinkle the gelatin over the top and let it “bloom” for at least 10 minutes. It will look like a thick, rubbery sponge.
In a medium saucepan, combine the sugar, salt, water, and honey. Cover and cook over medium-high heat for 3 - 4 minutes. REmove the lid and clip a candy thermometer to the side. Continue to boil without stirring until the mixture reaches 240 degrees Fahrenheit (the “soft ball” stage). Immediately remove from heat.
Turn your stand mixer (with the whisk attachment) to low. Very slowly pour the hot syrup down the side of the bowl into the gelatin. Once all the syrup is in, increase the speed to high.
Whip for 10 - 12 minutes. The mixture will go from clear and bubbly to thick, white, and tripled in volume. It should look like stiff, glossy marshmallow fluff. Add the vanilla extract in the final minute of whipping.
While the mixer is running, whisk together the powdered sugar and cornstarch. Generously dust a 9×9 inch baking pan with the mixture.
Pour the marshmallow mixture into the prepared pan. Use a greased spatula to smooth the top. Dust the top with more of the sugar/starch mixture. Let it sit uncovered at room temperature for at least 6 hours (or overnight) to set.
Turn the marshmallow block onto a cutting board. Use a sharp knife or pizza cutter (rubbed with a little oil or the sugar mix) to cut into squares. Toss the individual sawuares in the remaining sugar/starch mixture so the sides aren’t sticky.
Marshmallow Fluff
Yields: Approximately 3 cups
Ingredients
3 large egg whites (room temperature)
2/3 cup granulated sugar
3/4 cup honey
1/4 cup water
1/4 tsp salt
1 1/2 tsp vanilla extract
Directions
In the bowl of a stand mixer fitted with the whisk attachment, add the egg whites and salt. Beat on medium speed until soft peaks form. Set this aside while you prepare the syrup.
In a medium saucepan, combine the sugar, honey, and water. Stir gently just to moisten the sugar. Place over medium-high heat and clip a candy thermometer to the side of the pan.
Cook the syrup without stirring until it reaches 240°F. This is the "soft ball" stage, which is essential for the fluff to hold its structure.
Turn the mixer back on to low speed. Very slowly and carefully, pour the hot sugar syrup down the side of the bowl in a thin stream, avoiding the moving whisk to prevent splashing.
Once all the syrup is in, increase the mixer speed to medium-high. Continue whipping for 7–10 minutes. The mixture will become thick, snowy white, and very glossy.
Add the vanilla extract and whip for one more minute until the bowl feels cool to the touch and the fluff is stiff.
Storage and Shelf Life
Because this version is preservative-free and contains fresh egg whites, it should be stored in an airtight container in the refrigerator.
It is best used within 1 week. Over time, the sugar may begin to settle or the fluff may lose some of its volume, but a quick stir will usually revive it.
Self-Rising Flour
Yields 1 cup
Ingredients
1 cup all-purpose flour
1 ½ tsp baking powder
¼ tsp fine sea salt
Directions
Place the flour, baking powder, and salt into a fine-mesh sieve. Sift the mixture twice into a bowl to ensure the leavening agent is perfectly distributed.
Transfer to an airtight container.
Powdered Sugar
Yields 1 cup
Ingredients
1 cup granulated sugar
1 Tbs cornstarch
Directions
Place the granulated sugar and the starch into a high-speed blender or clean coffee/spice grinder.
Blend on the highest speed for 30 to 60 seconds. If you see granules, keep blending.
Vanilla Extract
Yields 8 oz
Ingredients
5 to 7 whole beans (preferably grade b)
1 cup 80-proof alcohol (vodka or bourbon)
1 airtight amber glass jar
Directions
Place the vanilla beans on a clean cutting board. Using a sharp knife, slit the beans lengthwise down the middle, leaving the ends intact. This exposes the “caviar” (tiny seeds) to the alcohol for maximum flavor extraction.
Place the beans in your clean glass jar. Pour the alcohol over the top until the beans are completely submerged. If the beans are too tall for the jar, you can cut them into smaller pieces.
Seal the jar tightly and store it in a cool, dark place.
Let the extract sit for a minimum of 8 weeks, through 6 months. Gently shake the jar once a week to help distribute the oils.
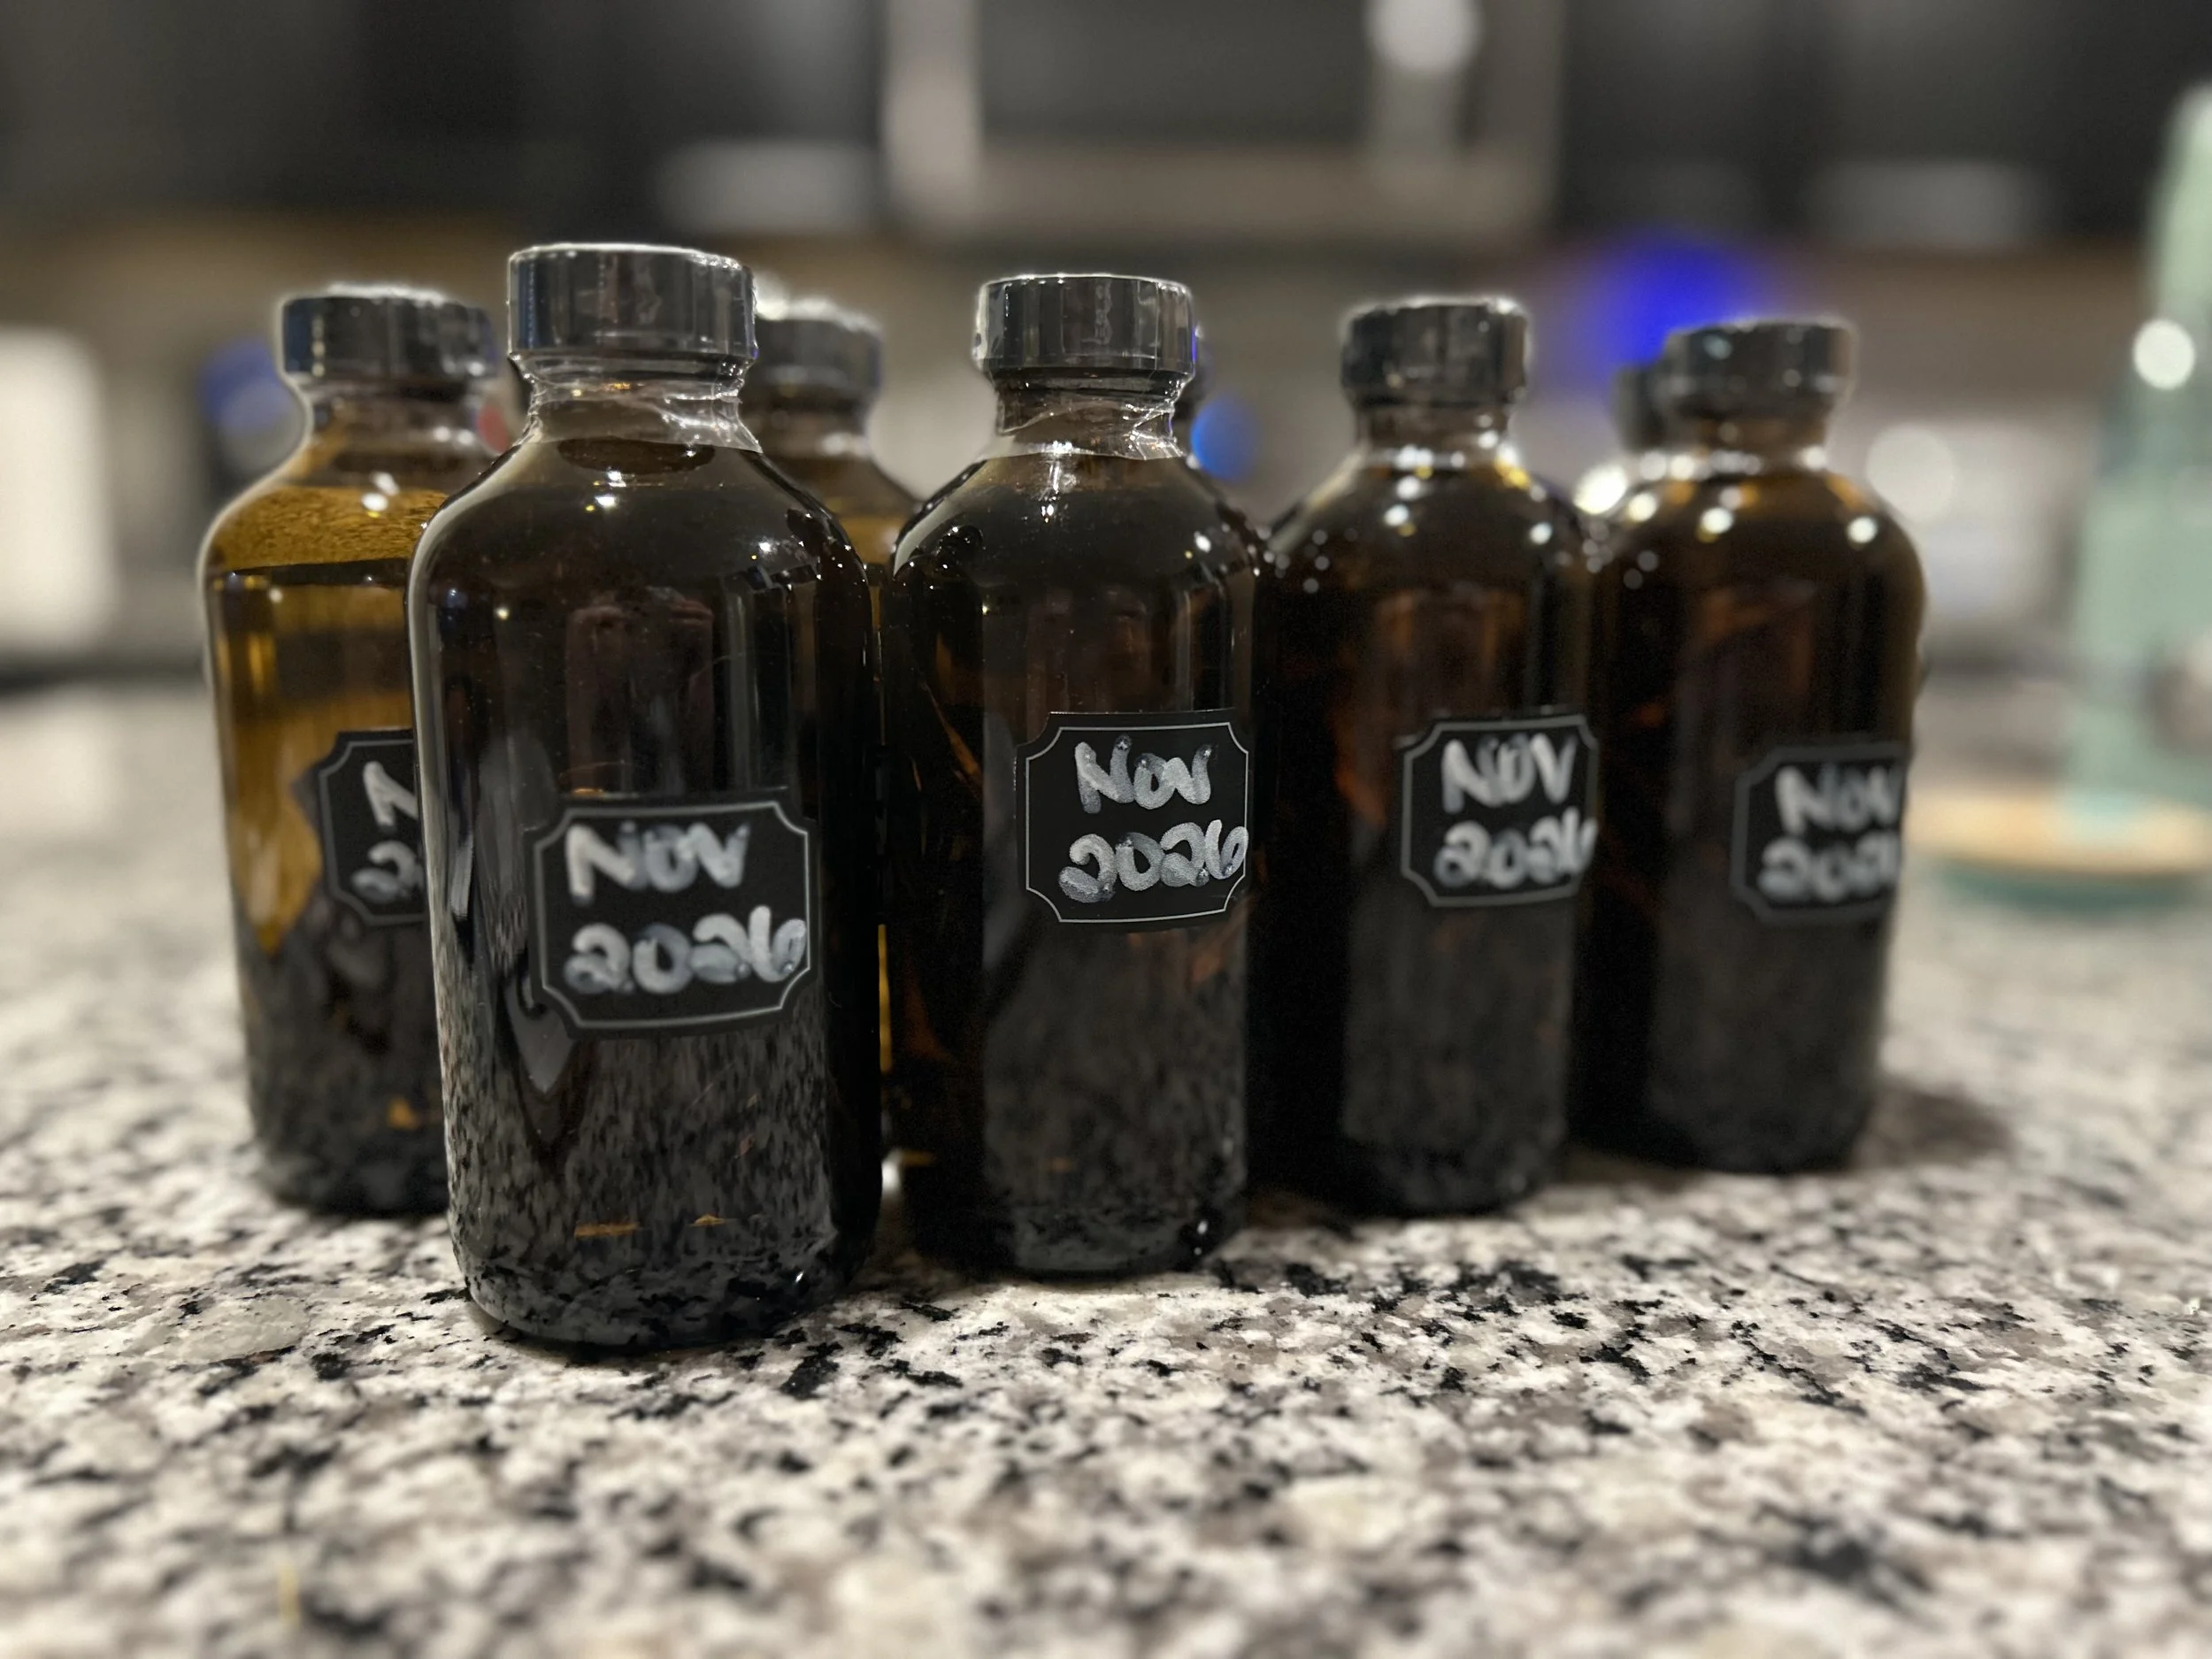
I ended up purchasing some bottles and the vanilla beans from Amazon. I also had a Reward coupon for Total Wine, so the vodka cost me $18 instead of $30. With a handle of vodka (and a little from the bottle I already had) and the 55 vanilla beans from Amazon, I was able to make 9 bottles of vanilla extract.
Here’s the math…
$18 for the vodka + $26 for the beans + $21 for the bottles = $65 invested
9 bottles x 8 oz each = 72 total ounces of vanilla extract
$65 / 72 ounces = $0.90/ounce
Great value brand: $3.94 per ounce x 72 ounces = $283.68
$283.68 value - $65 cost = $218.68 saved
Since I can reuse the bottles, the next round will be a bigger cost-saving effort ($0.61 per ounce). I’ll add the vanilla beans to my list so I can get notified when they go on sale again. They come vacuum-sealed, so I can buy those and the vodka ahead of time.
I really liked how the bottles came with stickers and a chalkboard marker. I almost didn’t use the labels because the marker didn’t appear to be working well. However, once the ink dried, the writing was clear and visible. I wrote the month they’d be ready to use as a reminder so I don’t have to keep track. The bottles also came with plastic seals that the hairdryer easily shrank. Overall, this was a super easy project.